RoguelikeDev Does The Complete Roguelike Tutorial
Week 2 - June 23rd - 29th 2020
Introduction
That’s right - we are continuing our work on the Roguelike Tutorial! This week we’ll try to get through parts 2 and 3 (and almost make it). I did have one small update after the last post that I briefly mentioned on Twitter so, I figured I should mention it here.
And with that out of the way, let’s continue on!
Part 2 - The Generic Entity, the Render Functions, and the Map
Part 2 is jammed packed! I’m not going to strictly follow everything but for the most part will keep the basic structure the same.
The Generic Entity
I’ve decided to go with a “constructor” function that will return a new “entity” table. Note that I’m calling it obj in the code but it’s just a table of key/value pairs. Maybe ent is a better as a name. 🤔
function new_entity(typ, name, sp, x, y, spd)
  local obj = {
    typ=typ,
    name=name,
    sp=sp,
    x=x,
    y=y,
    spd=spd,
    move=function(self, dx, dy)
      self.x += dx
      self.y += dy
    end
    attack=function(self, tx, ty)
      --
    end
  }
  return obj
end
Let’s take a closer look at the basic setup. I expect this to grow over time as I add things like damage. We may be limited on what we can squeeze in though.
  local obj = {
    typ = typ,
    name = name,
    sp = sp,
    x = x,
    y = y,
    spd = spd,
typis the “type” of entity. Right now I only am planing on two entity types, “pc” (player character) and “monst” (monster). This could be extended to include things like “npc”, “pet”, “animal” - maybenamethe entities “name”, it may be possible to name your player character. For monsters it would typically say what kind of monster, for instanceantspholds the number of the sprite on the sprite sheet that should be used for this particular entityx,ythe current coordinates of the entityspdhow fast (far) the entity can move in one turn
    move = function(self, dx, dy)
      self.x += dx
      self.y += dy
    end,
    attack = function(self, tx, ty)
      --
    end
  }
The generic entity will have some standard methods which may or may not call out to other functions within the cart. I’m not sure exactly what methods they will end up with, maybe just a few basics.
As a quick and dirty example, this would allow us to do something like the following.
  ents={
    new_entity("monst", "ant", ant, xpos-16, ypos-16, 8),
    new_entity("monst", "ant", ant, xpos-32, ypos+16, 8)
  }
Now we have two “ants” which we can then access using all().
  for e in all(ents) do
    spr(e.sp, e.x, e.y)
  end
Now, we have two a ant’s on the screen. This will probably evolve over the weeks but that should be good to get started. That brings us to the next step of Part 2.
The Render Functions
The tutorial render functions are each pretty straight forward. I think we can use a very similar setup in Lua.
def render_all(con, entities, screen_width, screen_height):
    # Draw all entities in the list
    for entity in entities:
        draw_entity(con, entity)

    libtcod.console_blit(con, 0, 0, screen_width, screen_height, 0, 0, 0)


def clear_all(con, entities):
    for entity in entities:
        clear_entity(con, entity)


def draw_entity(con, entity):
    libtcod.console_set_default_foreground(con, entity.color)
    libtcod.console_put_char(con, entity.x, entity.y, entity.char, libtcod.BKGND_NONE)


def clear_entity(con, entity):
    # erase the character that represents this object
    libtcod.console_put_char(con, entity.x, entity.y, ' ', libtcod.BKGND_NONE)
We aren’t too concerned about clearing at the moment so let’s just begin with drawing. Just like the Python example, we’ll make render_all() which will call draw_entity().
function render_all(ents)
  for ent in all(ents) do
    draw_entity(ent)
  end
end

function draw_entity(ent)
  rectfill(ent.x, ent.y, ent.x+7, ent.y+7, 0)
  spr(ent.sp, ent.x, ent.y)
end
So our drawing snippet from above becomes:
render_all(ents)
We pass in all of our entities, each one is forwarded on for drawing, and then it appears on the screen.
So far so good! You may have noticed that we’re using rectfill() in draw_entity(). This is because when the map is drawn, the entire thing is drawn. We need to ensure we remove those elements when they are below an entity.
The Map
The tutorial version now goes off into creating a class for the game map. My Pico-8 version currently just uses _draw() to fill in our floor “tile” and our wall “tiles”. It’s pretty brute force for now. We’ll improve it while we work on our random generation a bit later on - likely in the next section or two.
function _draw()
cls(0)
for iy=0,127,8 do
for ix=0,127,8 do
if ix == xpos and iy == ypos then
--
else
spr(flor, ix, iy)
end
end
end
-- fill in left and right "walls"
for iy=0,127,8 do
rectfill(0, iy, 7, iy+8, 0)
spr(wall, 0, iy)
rectfill(120, iy, 128, iy+8, 0)
spr(wall, 120, iy)
end
-- fill in top and bottom "walls"
for ix=0,127,8 do
rectfill(ix, 0, ix+8, 7, 0)
spr(wall, ix, 0)
rectfill(ix, 120, ix+8, 128, 0)
spr(wall, ix, 120)
end
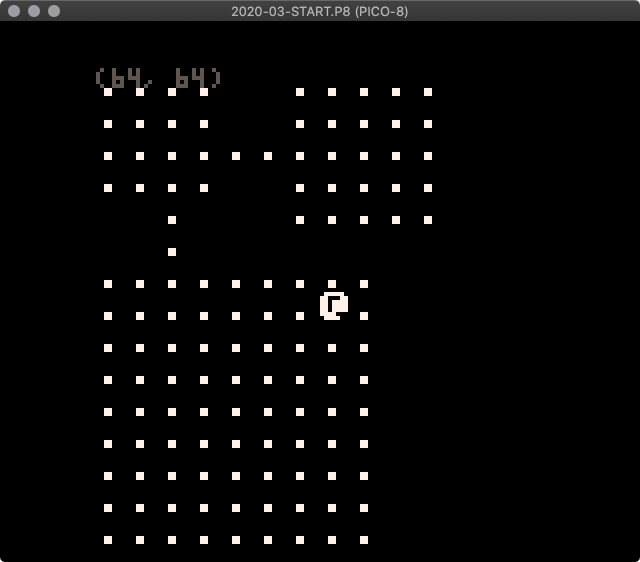
spr(plyr, xpos, ypos)
print('('..xpos..', '..ypos..')', 8, 8, 5)
render_all(ents)
This renders a screen similar to the following table:
| 0 | 1 | 2 | 3 | 4 | 5 | 6 | 7 | 8 |
|---|---|---|---|---|---|---|---|---|
| 1 | # | # | # | # | # | # | # | # |
| 2 | # | # | ||||||
| 3 | # | # | ||||||
| 4 | # | # | ||||||
| 5 | # | # | ||||||
| 6 | # | # | ||||||
| 7 | # | # | ||||||
| 8 | # | # | # | # | # | # | # | # |
Part 3 - Generating a dungeon
Of course I’m a bit behind schedule so I haven’t quite finished my implementation of the dungeon carving routine. I’ve also have yet to put in collision. create_room() is a pretty straight forward function. We simply pass in the screen X,Y we want to start at and then the width and height of the room. The Python implementation takes a “room” which we’re skipping over for now.
   def create_room(self, room):
       # go through the tiles in the rectangle and make them passable
       for x in range(room.x1 + 1, room.x2):
          for y in range(room.y1 + 1, room.y2):
              self.tiles[x][y].blocked = false
              self.tiles[x][y].block_sight = false
For now we are simply going to return our table of X,Y coordinates and the sprite.
function create_room(x,y,w,h)
  local obj={}
  for iy=y,y+h+1,1 do
    for ix=x,x+w+1,1 do
      add(obj,{
       x=ix,
       y=iy,
       sp=flor
     })
    end
  end
  return obj
end
Let’s see if we can get the tunnel functions in real quick. Again, we just have a basic implementation that returns a table of the coordinates we need to plot our “tunnels”.
function create_h_tunnel(x1,x2,y)
  local obj={}
  for x=min(x1,x2),max(x1,x2)+1,1 do
    add(obj,{
       x=x,
       y=y,
       sp=flor
     })
  end
  return obj
end

function create_v_tunnel(y1,y2,x)
  local obj={}
  for y=min(y1,y2),max(y1,y2)+1,1 do
    add(obj,{
       x=x,
       y=y,
       sp=flor
     })
  end
  return obj
end
Looks nice, right?
Yeah, it’s missing the walls!
Wrapping Up, For Now
I’ll have to try and wrap the last bit of the weeks code and update the GitHub project over the next day or so. I’ll also need to change around how we are writing the “map” so we can take into account impassable terrain and get ready for field of view. Then we’ll try and place some more monsters!
| Enjoy this post? |
|---|
| How about buying me a coffee? |